Showing posts with label green. Show all posts

Sunday, 16 September 2018

Blossoming Nail Art

Hi there!

I hope you're all doing well, because I sure am!

Remember last week when I told you guys I had plenty of Spring designs up my sleeve? Well, you're getting another one this week! And probably next week as well.
I hope you're excited, because it's about to all floral and beautiful up in here!
I'm hoping to do some more involved nail art soon. I have been very bad with time management lately which usually means that I opt for something simple, hence why I've been doing a lot of stamping lately.
Please just bear with me while I get my stuff sorted (ha ha).

This week's design is pretty simple. I decided to do something basic but pretty, and stamping is always fun (not to mention super easy).
Below you'll find a list of polishes and tools I used to create this fun, Spring design.

Blossoming Nail Art

I used these nail polishes:
Bootylicious Babe by Chi Chi Cosmetics
South Beach Bling Bikini by Chi Chi Cosmetics
White Stamping Polish by Born Pretty
Black Stamping Polish by Emily de Molly
Kwik Dry Top Coat by Sally Hansen
Top and Base Coat by Rimmel

As well as these tools:
Stamping plate Chic Peek BM-XL472
Stamper
Scraper
Tweezers
Liquid Latex by LuLaa
Small dotting tool
Mani saver

Blossoming Nail Art with South Beach Bling Bikini

Rightey-o, so I started with Top & Base Coat.
After drying, I applied two coats of Bootylicious Babe then, while that was drying, I applied liquid latex around each nail. I then gathered my stamping tools.
Taking Black stamping polish I applied it over the design on stamping plate BM-XL472, scraped off the excess, picked up the image and pressed it onto the nail. I did this for all nails, placing it in different positions each time. Cleaning the plate with my Mani Saver between colours, I continued with White Stamping Polish. Using the same image, I applied them to the nail in a different position to the previous one. Once I was finished stamping, I removed the latex with tweezers.
Taking a sandwich bag, I applied a small amount of South Beach Bling Bikini to it, then used a small dotting tool to place dots over the "buds" of the design.
Once dry, I finished with Kwik Dry Top Coat.


Blossoming Nail Art with Black Stamping Polish

I found that with this image, the "buds" which were supposed to be full dots did not want to pick up properly. I tried a few different things but it just wasn't working for me, so I decided to add to the design. I'm glad I did because it turned out so cute!
It almost looks like an Arizona Iced Tea can, which I am totally cool with! 


I really love this green and orange mix. I've done similar colours before, but I think this one turned out better. Even though it's only a little bit of colour, it totally enhances the whole thing. I'm sure I could use a variety of colours and it would still look good. Maybe I'll have to try some different options in the future.

What are your thoughts?

Don't forget to check out my social media pages.

Thanks for stopping by!

Sunday, 9 September 2018

Funky Floral Nail Art Design

Hello lovely people!

Welcome back! I took a break last week (in case you missed it) because, well honestly, why not? Sometimes you just need to mix things up a bit and take a break from routine. Plus, this blog is a hobby, so if I don't get something out each week, I'm not all that fussed.

It is officially Spring here, (even if the weather doesn't know it yet, it's pretty cold right now) which means pastels, floral prints, and all the pretty girly things! I can't wait to do more of this stuff! So many stamps, so little nails, sigh... But, right now I have this fun, funky, floral design to kick things off, along with plenty more ideas up my sleeve!
Let's get into it!

Funky Floral Nail Art

For this nail art, I used these nail polishes:
Go With The Flowy by Essie
Off Tropic by Essie
Lime Zinger by Lilypad Lacquer
Ring in The Bling by Essie
Attitude Attitude by Essie
Black Stamping Polish by Emily De Molly 
Kwik Dry Top Coat by Sally Hansen
Top & Base Coat by Rimmel

As well as these tools:
Large clear stamper
Scraper
Stamping Plate BP - 98 by Born Pretty
Liquid Latex by LuLaa
Mani Saver
Cotton ball with Acetone


Funky Floral Nail Art with Ring in The Bling

I started this design with Top and Base Coat. Once that was dry, I applied two coats of Go With The Flowy (should have used a peel off base coat, so much glitter!). I then took Attitude Attitude, wiped the excess polish off the brush using the neck of the bottle and gently swiped it across the nail sparingly. I did the same with Ring in The Bling, Off Tropic and Lime Zinger until I was satisfied with the coverage.
I then took my stamping tools and plate BP - 98, applied Black over the image I wanted to use, then scraped, picked up and pressed the design onto the nail. This image is quite large and has a whole bunch of different elements to it, so I decided to use as much as I could by selecting different areas of it. I made sure to clean the stamper and plate between each use with my mani saver and acetone.
All it took then to finish off was some Kwik Dry Top Coat to keep it sealed and shiny.


Funky Floral Nail Art with Lime Zinger

I'm pretty happy with the end result of this nail art. I was going for something more edgy than just a typical floral design, which I'd like to think I achieved. Not exactly how I wanted it to turn out, but still pretty sweet, I think.
What I really should have done was a reverse stamp to get exactly what I wanted, but I'm honestly so nervous about trying it.
I'll do it one day, I promise!


What do you think?

What funky designs have you got lined up for Spring?

Don't forget to check out my social media pages. 

Thanks for stopping by! 

Sunday, 22 July 2018

Chevron Nail Art

Hi all!
I hope everyone is doing well!I didn't think I was going to make it in time for this post today. My computer is slowly on the way out and I have a bad habit of leaving my photo editing until the last minute, which means I was about ready to give up.
But, I got it together and here we are!

This week I was inspired by a canvas I found on Pinterest. It looked so exciting, so I decided to put my own spin on it and turn it into a nail art design. I did keep it a little less messy, simply because I did not want to spend too long on clean up (I'm a bit lazy, ha ha). It's a combination of dry brush and chevron vinyls. Dry brush being my favorite technique and chevrons being my favorite pattern (besides paisleys, but that's a different story).

Chevron Nail Art

For this design, I used these polishes:
In Your Elemelon by Sinful Colors
Wonder Mint by Sinful Colors
Acid Test by Sinful Colors
Lilac Out Loud by Sinful Colors
Lady In Black by OPI
Nail Base & Top Coat by Rimmel
Kwik Dry Top Coat by Sally Hansen
Big Matte Top Coat by Sally Hansen

As well as these products:
Chevron Vinyls

Chevron Nail Art with Lilac Out Loud

I started this design with Nail Base & Top Coat, then applied two coats of In Your Elemelon. After allowing this to dry, I grabbed Lilac Out Loud. Using the neck of the bottle, I wiped the excess polish off the brush, then swiped the brush across each nail in various directions.
I repeated this with Wonder Mint and Acid Test, taking care not to overpower the In Your Elemelon underneath. I did go back in with Lilac Out Loud to make sure it came through. This dries pretty quickly, so I was able to do one colour after the other.
Once I was happy with the dry brush, I applied a coat of Kwik Dry Top Coat. I allowed the top coat to dry completely so I could apply the vinyls without ruining the whole design.
I placed two thin chevron vinyls on the lower half of my index finger (I only had thin ones, but you could use thick ones if you would prefer), making sure there was no space between them. I then applied two on my middle finger, leaving space between them. Skipping my ring finger, I placed two more on my pinky nail in the center, again, making sure there was no space between them. Before moving on, I made sure each vinyl was secured to the nail. Using Lady In Black, I painted over all nails except my ring finger nail, removing the vinyls before moving onto the next nail to avoid making a mess.
After allowing Lady In Black to dry, I applied Kwik Dry Top Coat. 

To complete the design, I applied Big Matte Top Coat.

Chevron Nail Art with Acid Test

I was pretty happy with the final look. It's not exactly like the image I got the inspiration from, but that's how inspiration works!
This one was fun to wear as I love chevrons, pastels and black... so all my favourites were covered in this design!
Most of these Sinful Colors are from their Pastel Neon Matte collection, so they're obviously made to go together. I do wish I had the whole collection, though!

What do you think?
Where do you find your inspiration?
Let me know by leaving a comment below, or find me on social media here.

Thanks for stopping by!  

Sunday, 24 June 2018

Yoga Pants Inspired Nail Art

Hello beautiful people!

I'm sorry I didn't get time to do a post last week - I had a very busy day and by the time I got home I was too tired to even look at my nails. However, I have had a lot more free time lately, which means I have added to my collection of nail art and now have back ups for days just like that. 

This week's nail art (in case you didn't read the title) was inspired by my fantastic new yoga pants, which I managed to get for free (using a loyalty program!)
These are the yoga pants for comparison.
The design on these pants is just so cool, that when I bought them, I knew I had to recreate it in nail art form. I was hoping to use holographic polish for this nail art and, luckily, I was able to find ones that matched pretty closely. 

Yoga Pants Inspired Nail Art

I used these polishes:
Sample by Celestial Cosmetics (I received this as a gift with purchase)
Big Hair Don't Care by Celestial Cosmetics
Mind That Mullet by Celestial Cosmetics
Mermaids Tale by BYS Cosmetics
Ready To Take Off by UNT
Kwik Dry Top Coat by Sally Hansen

I used these tools:
Sandwich bag
Fan nail art brush
Short nail art brush

Yoga Pants Inspired Nail Art with Mind That Mullet

I started with one coat of Ready To Take Off. After drying, I applied two coats of Sample. Once dry, I grabbed my brushes and a sandwich bag, then applied a few drops of Big Hair Don't Care to the bag. Using the fan brush, I picked up some polish and lightly brushed it across part of the nail. I did this for all five nails, making several passes, as Sample was quite dark and detracted from the lighter colour.
Moving onto Mind That Mullet, I applied some polish to the bag. Taking the short brush, I scooped up Mind That Mullet and painted the nail where Big Hair Don't Care hadn't been previously applied, whilst still leaving space for the third and final colour. Again, I had to make several passes on each nail.
Lastly, I repeated these steps for Mermaids Tale. This one didn't require quite as many coats, due to the iridescent nature of this polish. I then went back in with Sample to create some space in each colour, giving it more of a textured look.
To finish, I applied a coat of Kwik Dry Top Coat. 


Yoga Pants Inspired Nail Art with Sample

I had a great time creating this design. It took a whole lot more work than I was anticipating, but it was interesting to see the way the colours reacted to each other. Mermaids Tale comes out pretty majestically over the dark colours. This is part of the fake Holo collection from BYS Cosmetics (they labeled it as Holographic, but we all know it's not). You can see more of that here.

It was pretty cool to have my nails match my clothing for a change. I always wanted to be someone who changed their nail polish every day just for the effect, but I struggle to find time to do them even once a week, let alone once a day!

Next time, I would probably use Big Hair Don't Care as the base colour. It would have been so much easier, but I wanted to stick with the inspiration as much as I could. I definitely learnt something from this one.  

What do you think of the mash of holos?

Have you recreated the design of your yoga pants?

Leave me a comment, photo or link.

Thanks for stopping by!

Sunday, 10 June 2018

Gradient Garden Nail Art

Hello hello!

I hope my fellow Aussies are enjoying the long weekend. Usually, I'd be away right now. Sitting by the fire, wine in hand, looking over the dam. But, here I am, bringing you more of my nail creations. I'm okay with that though. It has taken me about 4 hours to get my photos ready for today (lesson learnt, I'll be getting my photos edited in advance from now on). Photoshop was being a pain in the butt, but I finally got it sorted, so here we go.

This week, I have a fun gradient with some stamping. I have no idea what to call it... gradient garden? I think that will do. It includes some of my favorite nail things; gradients (obviously), pastels and stamping! Details on polishes, tools and directions are below. 

Gradient Garden Nail Art

I used these polishes:
Rose Libertine by Rimmel 
Roll In The Green by Rimmel
Lovey Dovey by Rimmel
White Stamping Polish by Born Pretty
As Black As Night stamping polish by Hit The Bottle
Nail Base & Top Coat by Rimmel
Kwik Dry Top Coat by Sally Hansen

I also used these tools:
Liquid latex by LuLaa
Cosmetic sponge
Large clear stamper
Scraper
Stamping plate 05 by Born Pretty
Cotton ball
Mani saver

Gradient Garden with Purple

I started with Nail Top & Base coat. Once dry, I applied two coats of Roll In The Grass. After allowing time to dry (at least to the touch), I applied liquid latex around each nail, then continued to let dry. Next, I grabbed a cosmetic sponge and applied one stripe of Roll In The Grass, Lovey Dovey and Rose Libertine across the sponge. I then gently dabbed over each nail, making sure each colour was evenly distributed on the nail whilst not blending them together too much. This took a fair few coats for all five nails, and I needed to reapply the polishes to the sponge a few times. Once I had an even gradient, I removed the liquid latex and allowed the polish to dry. I then gathered my tools and stamping plate 05. Picking my design, I painted White stamping polish across the design, scrapped off the excess and picked up the image with the stamper. I pressed the design onto my index nail, making sure to roll the stamper in order for the stamp to completely cover the nail. Then, using some tape, I removed what had transferred onto my skin (I may have forgotten to use latex this time). Remembering to clean my plate between each use with my mani saver and a cotton ball dipped in acetone, I repeated this on my middle finger. I did the same for my ring and pinky finger, only using As Black As Night stamping polish instead. To finish off the design, I applied a coat of Kwik Dry Top Coat. 

Gradient Garden with Green

I initially intended on continuing with the white stamping, but after doing two, I decided black would look better. Since I had already done the white, I was not starting again and decided it was more fun with the two different colours. If I were to recreate it, I'd stick with black. I feel like it brings out the pastel colours underneath so much better. These colours deserve to shine! I love this green, I'm a little obsessed with it and I probably have about 4 similar ones. Woops.

What do you think?
Would you try this design?

As always, let me know.

Thanks for stopping by!

Sunday, 3 June 2018

Boho Gradient Nail Polish

Good afternoon readers!

I hope you are all well.
As for me, unfortunately I've had a cold for about a week now, but it's slowly working it's way out. Luckily, I am currently well enough to do some nail art.
Let's hope it get better from here!


As you're most likely aware, I didn't get a post out last week... For that, I'm slightly sorry. Only slightly because I was extremely exhausted after my trip. But, I did have fun while I was there. Happy to be home though, always happy to be here.

This week's nail art was inspired by two polishes that I had sitting next to each other...Happens all the time! I love my organization skills, haha!
I decided to do a gradient for this one, but soon realized it was missing something. So I added some stamping!
I present to you now, the Boho Gradient!


Below you'll find a list of polishes and tools I used to create this mani. 

Boho Gradient Nail Art 

These are the polishes I used:

Summer by piCture pOlish 
Orchid by piCture pOlish
Sparkling Cyan-ide by Hit The Bottle
Tipsy Grasshopper by Hit The Bottle
Ready To Take Off by UNT Cosmetics
Big Kwik Dry Top Coat by Sally Hansen

These are the tools I used:

Cosmetic sponge
Stamping plate BP - 152 by Born Pretty
Large clear stamper
Plastic scraper
Cotton balls
Mani saver
Liquid latex by LuLaa

Boho Gradient with Orchid 

I started by applying one coat of Ready To Take Off base coat. Once dry, I applied liquid latex around each nail, then painted two coats of Summer on each nail.
After allowing to dry, I grabbed my cosmetics sponge and brushed Summer and Orchid across it. I then dabbed it on each nail, re-applying polish to the sponge after every few dabs. Once satisfied with the gradient, I removed the liquid latex.
After allowing ample time for everything to dry, I applied Big Kwik Dry Top Coat. While that was drying I grabbed stamping plate BP - 152, a stamper, a scraper and the stamping polishes. I chose the design I wanted, then painted a few blobs of Sparkling Cyan-ide and Tipsy Grasshopper over the design. I then scraped off the excess polish, which also blended them together, then picked up the image and pressed it onto the nail. I did this for all five nails, then finished off with Big Kwik Dry Top Coat.


Boho Gradient with Sparkling Cyan-ide & Tipsy Grasshopper

I enjoyed this design, both wearing and creating it. I did mess up a couple of the stamps, due to the polish drying out a little too quickly. But, that's nail art life for you! Ha ha.
These colours are so fun together. So much holo!


The gradient was a little harder to do than usual. Both of these polishes contained glitter, which meant I was basically just dumping it straight onto my nails.
I did get there in the end though, and turned out amazing, if I do say so myself. 


What do you think?
Do you like this as much as I do?

Thanks for stopping by!

Sunday, 15 April 2018

Holographic Aztec Inspired Nail Art

Hello everyone!

I hope you're enjoying the weekend. It has been raining on and off for the last few days here, which is amazing and much needed! I love rainy days; staying inside with cozy clothes and all the internet I can poke a stick at. I spent most of yesterday looking at various nail art to get some new ideas. It didn't turn out as successful as I had hoped, but it's always good to see what everyone else is doing with their amazing nail skills.

Today, I am bringing you this fun, holo-filled, Aztec-inspired nail art. I have these fabulous holographic polishes from Celestial Cosmetics that are dying to see the light of day again! I am always so scared to use holo in nail art, but I think this one has helped break me out of this a bit. Hopefully you'll get to see more of it. 

Holographic Aztec-inspired Nail Art

For this design I used these polishes:
Blanc by Essie
Classy, Sassy & A Little Badassy by Celestial Cosmetics
Hell In High Heels by Celestial Cosmetics
Broken Glass by Celestial Cosmetics
Crystal Ship by Celestial Cosmetics
Black Stamping Polish by Emily de Molly
Big Primer Base Coat by Sally Hansen
Kwik Dry Top Coat by Sally Hansen

I also used these items:
BP-L048 Stamping Plate by Born Pretty
Large clear stamper
Scarper
Liquid Latex by Lulaa

Holographic Aztec-inspired Nail Art with Hell In High Heels

I started this design with Big Primer base coat. After drying, I applied two coats of Blanc. I then applied liquid latex around each nail. Taking Broken Glass, I wiped the excess polish off the brush using the neck of the bottle, then gently brushed it on to each nail. I continued with Crystal, Hell In High Heels, and Classy, Sassy & A Little Badassy. I did go back in with the polishes that I felt needed a stronger presence. I then took BP-L048 stamping plate, painted Black stamping polish over the design I wanted, scraped off the excess and used my stamper to transfer each design to the nail. I used three different designs, all from the same plate. After allowing the polish ample time to dry, I applied Kwik Dry Top Coat to finish. 

Holographic Aztec-inspired Nail Art with Broken Glass

So that's all for this one!
I love dry brush nail art - with the addition of holo and stamping over top, it's such a fun design! I love the colour combination of this design, the variation of strong bright colours with the soft ones create a nice juxtaposition. 


I decided to use different designs from the same plate. I don't do this too often, and I'm seeing why - I'm not all that pleased with how it turned out.
If I were to do it again, I'd use the diamond on my pinky, and possibly only on two nails, to really let that dry brush holo shine. Either way, it's still a cool design (in my totally biased opinion).


What are your thoughts?

Thanks for stopping by!

Sunday, 7 January 2018

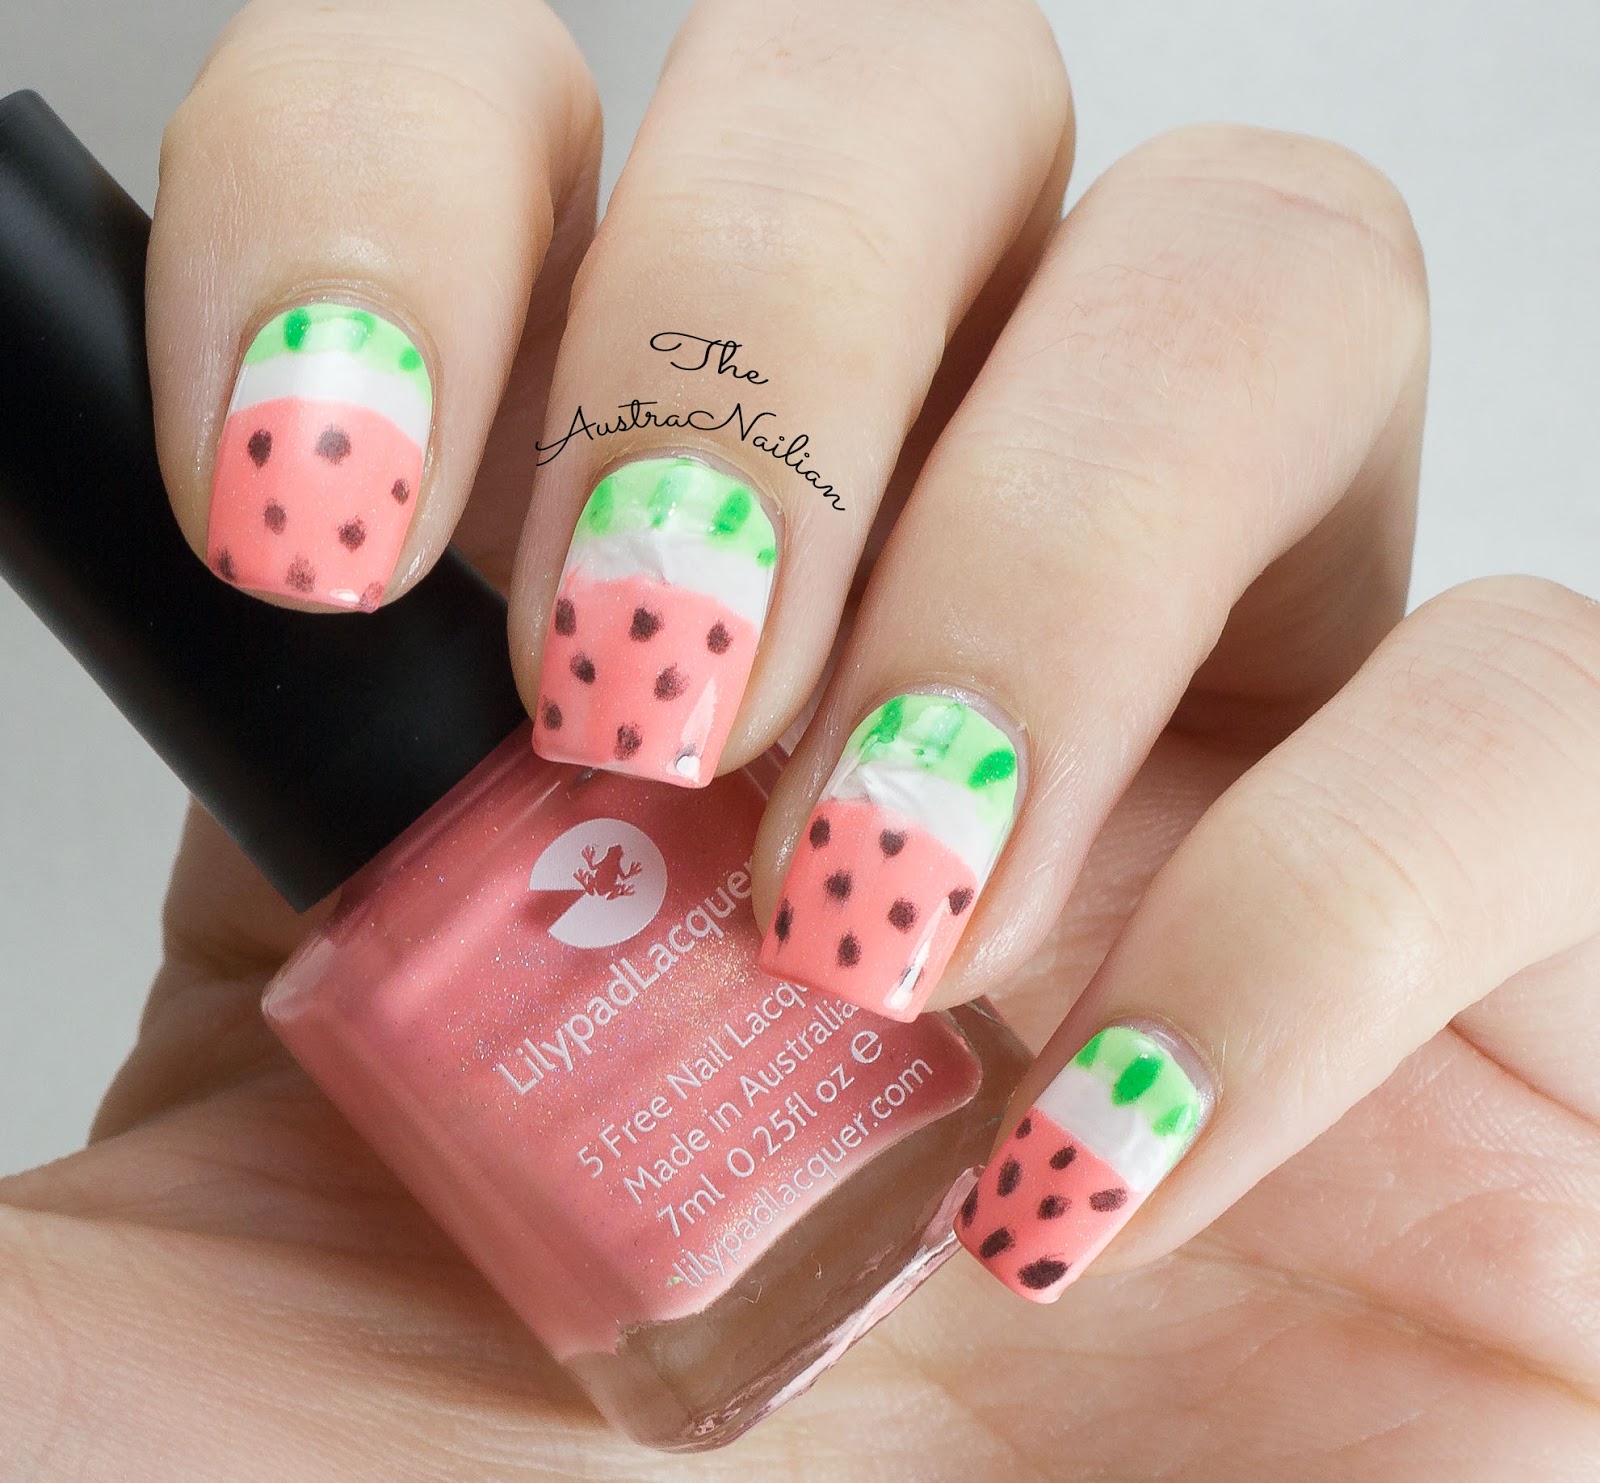
Sweet Sweet Watermelon Nail Art


Hello everyone,

I hope you all enjoyed the holiday season, whether celebrated or otherwise. I have been enjoying some time out with friends and family as well as exploring the beauty of North East Victoria. And of course, stocking up on some new polishes. I think I picked up about 20 new ones over the last two weeks, woops! 

I thought I'd start 2018 off with a super sweet summer-perfect nail art. A fun Holo watermelon design! I am not really to keen on using holos/glitters and the like in my nail art design, but I'm trying to get around that because I have some amazing Holo's that I don't often get to use, not to mention the thousands more I want to get my hands on. So, I decided to go all out with this one, holo everything! Well, almost. I also used a shimmer. Not that you can really see in these photos, but that's okay, I know it's there. Keep reading for a list of nail polish and tools I used to create this nail art design. 

Sweet Sweet Watermelon Nail Art

I used these polishes:
Paradise Punch by Lilypad Lacquer
Lime Zinger by Lilypad Lacquer
Mint Mojito by Lilypad Lacquer
Be Happy & Smile by Essence
Suzi Skis In The Pyrenees by OPI
Ready To Take Off by UNT
Kwik Dry Top Coat by Sally Hansen

The tools I used are:
French Tip Guides
Short striping brush


Sweet Sweet Watermelon with Paradise Punch


To create this nail art design, I started with with Ready to Take Off, then applied two coats of Be Happy & Smile as my base colour. Once dry, I applied Kwik Dry Top Coat. Giving this ample time to dry, I got Paradise Punch & Mint Mojito ready to go. I placed the french tip guide slightly above the middle of the nail, making sure to press them down tightly to avoid bleeding. Once in place, I applied Mint Mojito closest to the cuticle & Paradise Punch on the opposite side. Once I was satisfied with the opacity and prior to drying, I removed the guide. As you can see, with the first nail it was quite easy to remove, but as I went along it got harder and harder to remove each of the guides. This is because of the peel off base coat I used. I should have applied the guides to the nail as I did each one, rather than putting them all on at once. Lesson learned!
Moving on, I then took my short striping brush with Lime Zinger and created small lines over Mint Mojito. After cleaning the brush, I used Suzi Skis In The Pyrenees to create the seeds. I then finished off with a Kwik Dry Top Coat.


Sweet Sweet Watermelon with Mint Mojito

This is a design I've wanted to try doing for ages! I have no idea why it has taken this long, but I'm pretty happy with how it turned out, despite the lifting. I hoped the top coat would help weigh it down, but it clearly didn't. I have learned my lesson, though. This is not the first time this has happened, however I hope it's the last. I guess you could call this a bit of a nail fail.

On a side note, I always find it funny that most watermelon designs have seeds, considering most people hate seeds in the fruit, but I suppose it does add to the whole design. I think if I were to do this again, I'd probably use a dotting tool instead of the brush for seeds, as most of these look pretty terrible. 

What do you think?
Have you done this popular design?

Thanks for stopping by! 

Sunday, 17 December 2017

Foliage Stamping Nail Art

Hello people!

Can you believe it's almost the end of the year?
I definitely cannot.
Where the heck does all this time go?
Take me back to being a kid when everything seemed to last forever, or work, ha ha. I thought I'd keep you guys up to date with my blog plans for the next few weeks, so this will be my last post of 2017. I'll be travelling to Sydney to see family and friends over Christmas and will be thoroughly enjoying some time off at home. I'll be back in the new year with more summer nail art, which I'm really excited for. I've got to get planning my Australia Day nail art! If you follow me on Instagram, I'll be posting a few designs I have stored away in this time, so keep an eye out for that. 


For this week's design, I've done a fun foliage stamping nail art. I'm currently really obsessed with these kinds of patterns and I happen to have several plates full of these beautiful leafy designs. So here it is; keep reading to see what I used to create this mani. 


Foliage Stamping Nail Art

I used these polishes:
Wham Bam by BYS Cosmetics
Tipsy Grasshopper Stamping Polish by Hit The Bottle
Cinderella by Sinful Colors
Big Primer Base Coat by Sally Hansen
Kwik Dry Top Coat by Sally Hansen

And these products:
Stamping plate BP-L076 by Born Pretty
Large clear stamper & scraper
Sticky tape
Cotton balls
Mani saver
Paper towel
Clean up brush
Acetone

Foliage Stamping Nail Art with Green 

I started with Big Primer Base Coat, then applied two coats of Cinderella. Once dry. I set up my 'stamping station'. Placing paper towel under stamping plate BP-L076, I applied Wham Bam to the pattern I wanted and scraped off the excess polish. Taking my stamper, I picked up the image and stamped it onto my middle finger. Before it dried, I took a piece of tape and used it to remove any polish that transferred to my skin. Usually I would use liquid latex, but I currently don't have any and this works well enough. I then cleaned my stamping plate using a cotton ball with acetone (held by my mani saver) and continued with my ring finger. For my index and pinky fingers, I used the same method outlined above, although with  different design and Tipsy Grasshopper. Once I was finished, I applied my Kwik Dry Top Coat.

Foliage Stamping Nail Art with Green

This one was pretty easy. Gotta love stamping!
I was going to stick to just one design for all nails, but I decided there were too many awesome designs on this plate and I just had to use another one. The pattern on my index and pinky fingers is a really cool leaf vein style. I wish the colour was a little darker so you could see the detail because I really love it. I guess I'll just have to buy more stamping polish. Watch out Hit The Bottle, I'm coming for you! Ha ha ha. 


What do you think?
Are you loving this foliage trend as much as I am?

I hope you all have a wonderful and safe end to the year and I'll see you next year!
Thanks for stopping by!

Sunday, 10 December 2017

Ohh Shiny! Sequins & Metallic Nail Art


Hello lovely people.

I know we are currently within the holiday seasons, but as I detest all things Christmas, I won't be doing any kind of festive nail art this year (Here is one from last Christmas). Instead, I am opting for my usual style, what ever the heck I feel like, gosh! (little Napoleon Dynamite reference there). I will be focusing mainly on summer themes. This one how ever, is something I've wanted to do for a while. I have purchased a multitude of these nail sequins and they're just sitting in my nail art box, waiting for the day I'm brave enough to try them out. That time has finally come!  

Ohh Shiny! Nail Art

I used these polishes:

Ready To Take Off by UNT Cosmetics (peel off base coat)
A Mermaid's Tale by Face Of Australia, from the Calypso Bay collection
Kwik Dry Top Coat by Sally Hansen

The only products I used were the sequins which happen to have the longest product name ever! They're from Born Pretty store and the 'colour code' is 11.

Ohh Shiny! Nail Art with A Mermaids Tale

For this nail art, I applied a thin coat of Ready To Take Off. I did this so it'd be a hell of a lot easier to remove the sequins. I'm really not sure how these would go with acetone, but I can imagine it would not be fun. Once that was completely dry, I applied two coats of A Mermaids Tale. I then removed a small amount of the sequins from the jar and spread them out on my desk - this makes it a little easier to pick them up. I have a bottle of Kwik Dry Top Coat that's gotten a little gluggy with age, so I used this as a glue. I placed a small dot of polish onto my ring finger, placed a sequin on the polish and pressed it onto the nail using my finger. I continued this using various sizes to fill the nail as much as possible. I then placed a small dot of polish on my index and middle finger, then placed a large sequin on each of them. I finished with my non-gluggy Kwik Dry Top Coat. 

Ohh Shiny! Nail Art with Born Pretty Sequins

This didn't turn out exactly as I had planned it in my head and I know exactly why. Some of these sequins are thicker than I had originally thought. Being that I was applying a flat, non-malleable item onto a rounded surface, there were bound to be some issues. If you look closely at some of the larger ones you'll see they are slightly raised when placed outside the center of my nail. I think if I were to do this again I'd use a lot more of the smaller ones and stick to the center of the nail for the larger ones. 

I do love these colours together, though. The metallic polish being so close to the greeny-blue sequins was pretty exciting. I haven't really used this polish much, due to the streaky nature of it. But for this, I think it totally works. 

What do you think?
Do you like sequins in nail art?
Let me know in the comments.

Thanks for stopping by!

Sunday, 3 December 2017

Peachy Smoosh Marble & Stamping Nail Art

Hey everyone, 

It is officially summer here in the land of Oz! Not that you'd ever know it was anything other than winter in Victoria, but nonetheless, still summer... which means bright, fun, colourful manis that I am so ready for!
So, as you know, I have all these super cute stamping polishes from Hit The Bottle and I've been a little scared to use them. This week I decided to let loose and just go for it. I didn't just want to do stamping, so I decided to mix in my favorite nail art technique, Smoosh Marble! Here's what I've got for you this week, peachy smoosh marble & stamping.

Peachy Smoosh Marble & Stamping Nail Art
For this fun design I used these polishes:


Big Primer Base Coat by Sally Hansen
Apricot Cockatoo by Essence
Tipsy Grasshopper by Hit The Bottle
Sparkling Cyan-ide by Hit The Bottle
Drunk Tank Pink by Hit The Bottle 
Paint The Town Violet by Hit The Bottle
Kwik Dry Top Coat by Sally Hansen

These products were also used:

BP-98 Stamping Plate by Born Pretty
Liquid Latex by Lulaa
Large clear stamper


Peachy Smoosh Marble Nail Art with Sparkling Cyan-ide
I started with Big Primer base coat. After drying, I applied two coats of Apricot Cockatoo. Whilst that was drying, I applied Lulaa latex around my middle and ring fingers. Taking stamping plate BP-98, I applied small dots of Tipsy Grasshopper, Sparkling Cyan-ide, Drunk Tank Pink and Paint the Town Violet to the design, then scraped it a few times to blend the colours. I then quickly picked up the design with my large stamper and pressed it over my ring finger. I removed the latex from this finger and cleaned up around the nail where necessary. Moving onto my middle finger, I grabbed my stamper and dropped small amounts of Tipsy Grasshopper, Sparkling Cyan-ide, Drunk Tank Pink, Paint the Town Violet and Apricot Cockatoo on to it. I then pressed the stamper over my nail, spreading the polish out. I continued to stamp over the nail until I was satisfied with the colour distribution, then removed the latex and cleaned up. I finished off with Kwik Dry top coat. 

Peachy Smoosh Marble Nail Art with Apricot Cockatoo

I am happy with how this turned out, although I feel the stamp was a little duller than I was hoping for. I may have over done the scraping,  causing less polish to be left on the design. But this smoosh is awesome! I think it looks like a grungy, arty, delightful mess and that's super fun. 

What do you think? 

Don't you just love these bright stamping polishes?

Thanks for stopping by!