Showing posts with label triangles. Show all posts

Sunday, 29 April 2018

Black and Gold Nail Art

Hello everyone, 

I hope you've all enjoyed your weekend. It was pretty good on this side of the globe; bright, sunny, and just PERFECT for that classic jeans and t-shirt look... which just so happens to be my preferred attire - after PJs, of course!

I've got a nice and simple design this week. I have got a bit of thing with triangles on my nails, so this one was fun to create and wear. The best part is, you don't need any super-skilled talent to re-create this design! Don't let the simplicity and ease fool you, though - this design oozes elegance and is perfect for any occasion.


The following polishes were used for this design:
Golden Luster by BYS cosmetics
Lady In Black by OPI
Big Primer Base Coat by Sally Hansen
Kwik Dry Top Coat by Sally Hansen

As well as these products:
3mm Striping tape


To create this design I started with Big Primer Base Coat. 
Once dry, I applied three coats of Golden Luster, allowing more than enough time for each layer to dry completely. This shade is very sheer, as you can see (I probably should have added an additional coat in order to hide my smile line more thoroughly, however I didn't notice until I reviewed the photos). 
I then applied a coat of Kwik Dry Top Coat and let dry. 
Once it was completely dry, I cut four pieces of striping tape and applied two in the shape of a triangle on my middle and ring fingers, making sure to adhere it well to the nail. I then applied Lady In Black to the inner triangle on my middle finger, making sure it was opaque, then removed the tape. Moving onto my ring finger, I painted Lady In Black on the outer section of the nail, again ensuring complete coverage and removing the tape. Once dry, I applied another coat of Kwik Dry Top Coat to finish the design. 
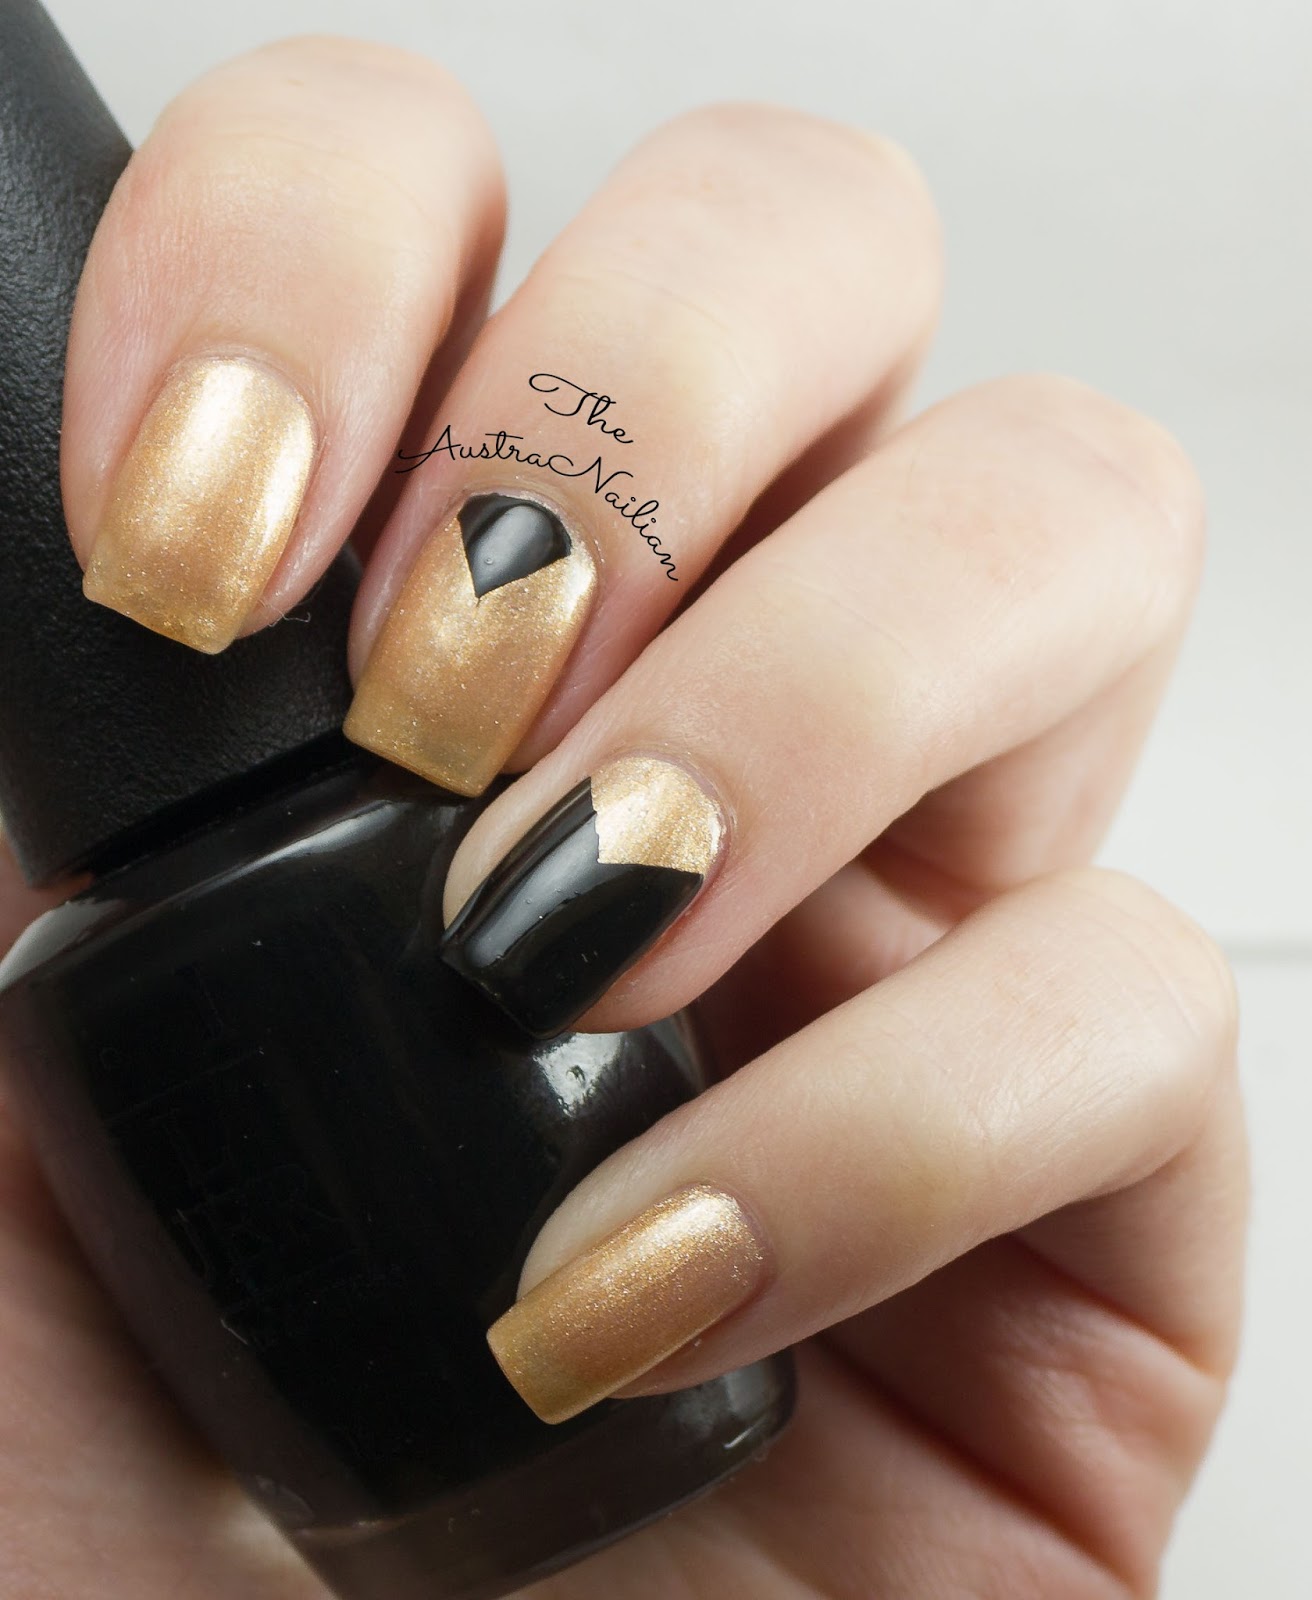

Simple, yet beautiful.
A perfect example of how black and gold were just made for each other.
I really do love this gold polish, however I just wish it were more opaque...*sigh*... we can't have it all now, can we?

The beauty of this design really is in its simplicity.
It's so easy that ANYONE can do it - all you need are your favourite colours and some striping tape - which is cheap!
So cheap, in fact, that I have bucket-loads of it... I really should incorporate it more into my designs!  


So, let me know your thoughts.
Do you like the black and gold look?

What colours would you try for this design?

Thanks for stopping by!

Sunday, 8 October 2017

Mint & Orange Nail Art

Hello everyone!

You may have noticed my absence recently. Things have been really busy over the last few weeks. I wasn't even sure I was going to get this one out! But here we are and I'm glad that I have. I've really missed posting & doing nail art. Since this break started I've had one single colour on my nails for far too long! Luckilyy, I recently purchased some amazing holographic polishes, so I got to try those out during this time. 

I have also been having some issues with my nails. Lots of breaking and tearing, which I think is a side effect of my dermatitis, so I have been trying to get that under control and keeping them all even.

Prior to this break, I had done these cute geometric pattern mint and orange nails, which I haven't gotten out yet, and will now be this week's nail design. If you keep reading, you'll see what I used for this design and how I did it. Please enjoy.

Mint and Orange Nail Art Design

To create these lovely mint and orange geometric pattern nails, I used the following items:
South Beach Bling Bikini by Chi Chi Cosmetics
I Feel Good by Chi Chi Cosmetics
Kwik Dry Top Coat by Sally Hansen
Stamping plate BP - 77 by Born Pretty 
Large clear jelly stamper (I don't recall the brand)
Scraper (This came with my stamper, so again I don't recall the brand)
Camo Coat by Celestial Cosmetics

Mint and Orange Nail Art with South Beach Bling Bikini

I started with two coats of I Feel Good and allowed them to dry. This polish is a bit thicker than usual polish so it does take a while to dry (I recommend thinner coats for faster drying time). The best way to know this polish is dry is when it becomes fragrant. Once I was satisfied they were dry, I applied Camo Coat around each nail to allow for easier clean up. I then took stamping plate 77, stamper, scraper and South Beach Bling Bikini, and applied a generous amount of Orange to the stamping plate. Taking my scraper, I dragged it evenly over the design and off the plate. I picked up the image with my stamper and lined it up as best I could with the nail. Unfortunately for me, the bottom of my scraper is scratched, which makes it hard. As the polish turned out a lot lighter than I was expecting, I decided to do a second stamp over the top of the first. I then removed the Camo Coat from that nail and repeated these steps for my middle finger and thumb. As for my index finger, I used a different design from the same plate, using the same steps as my previous nails. And of course, I finished with a coat of Kwik Dry Top Coat.


Mint & Orange Nail Art with I Feel Good

Although I love these Chi Chi flakies, they always seem to jut out, which you can see on my pinky finger above. This is mostly a visual problem, however I do find that they catch on things like clothing a fair bit, which is always annoying and can cause the polish to peel up. I would love to see them do the flakie colours but without the flakes.

Aside from that, I'm pretty pleased with how they look. These colours look so good together and I do love the patterns on this plate. 

What do you think about this simple pastel nail art design? Leave me a comment below. 

P.S. I am looking for a little feedback on what your overall opinion on my posts are, good, bad and/or ugly. You can leave a comment below, or send an email to theaustralnailian@gmail.com. I'd really appreciate it. 

As always, thanks for stopping by!

Sunday, 26 March 2017

Simplistic Geometric Nail Art

Hello all!


We have had a couple of rainy days here lately and I'm loving it, bring on winter! I can't wait for all the winter colours to get some good use! I'll have to start planning ahead and working on some designs. If you'd like to see me do something specific, leave a comment below.

I'm really not sure what to call these nails today... I had these two awesome colours that were very similar, so I had do something with them together... and this is what I came up with.
Simplistic Geometric Nail Art

As I said, I have no idea what to call them. But I do like them. They were quick and still have an awesome impact.


Simplistic Geometric Nail Art with Green - BYS


So for these nails I used Zebra Turquoise - BYS from the Zebra nail polish kit, which is a metallic blue with blue and silver shimmer/fine glitters, Wham Bam - BYS, which is a metallic green with green and silver shimmer/fine glitters, and striping tape. 

I am also currently using UNT - Ready for Take Off base coat & Sally Hansen - Big Kwik Dry top coats. This is what I use for most manis at the moment.  

The technique was fairly simple. I used two coats of blue as a base, applied a quick dry top coat and allowed to dry. I used two pieces of striping tape to create a triangle in different areas of each nail then carefully painted inside the triangles with Green. The tape was then removed before allowing it to dry and then I finished with a quick dry top coat. That's all there is to it.

Simplistic Geometric Nail Art with Blue - BYS

This one is great for a quick nail art when you're in a bit of a rush. Aside from drying time, it doesn't take long at all. Plus, this is one of those designs you can do with any number of colour combinations. I have actually done something a little similar in this post. 

Simplistic Geometric Nail Art

What colours would you use? Leave me a comment below!

Thanks for stopping by.

Sunday, 1 January 2017

First nail art of 2017! The High Lights using Sally Hanson.

Hello all, and welcome back!

I hope you've all had a happy and safe holiday season! 

I've got some pretty simple nails to share with you (as always, because I'm lazy and don't like doing things that require effort - haha). I am planning to do some more intricate designs soon, so keep an eye out!
This is called The High Light, due to the fact that I think it looks like the kind of lights used at a red carpet event or something of that nature. 


 The High Light

I used two coats of Sally Hansen's 220 Celeb City for the base. Once dry, I took two pieces of striping tape to make a diagonal triangle. Using Sally Hansen's Triple Shine Make Waves, I carefully painted on both sides of the triangle. I then quickly removed the tape, and once dry, a top coat was applied.
I love the way these two colours go together! If you look at it in the right light, they melt into each other perfectly.


The High Light

The possibilities are almost endless with this design. You could do this with three colours and give it a star burst effect, or you could simply change the colours to suit the situation. If I did this again, I'd probably use two or three pastel colours. 

What colours would you use?
Let me know!


Thanks for stopping by!