Sunday, 29 April 2018

Black and Gold Nail Art

Hello everyone, 

I hope you've all enjoyed your weekend. It was pretty good on this side of the globe; bright, sunny, and just PERFECT for that classic jeans and t-shirt look... which just so happens to be my preferred attire - after PJs, of course!

I've got a nice and simple design this week. I have got a bit of thing with triangles on my nails, so this one was fun to create and wear. The best part is, you don't need any super-skilled talent to re-create this design! Don't let the simplicity and ease fool you, though - this design oozes elegance and is perfect for any occasion.


The following polishes were used for this design:
Golden Luster by BYS cosmetics
Lady In Black by OPI
Big Primer Base Coat by Sally Hansen
Kwik Dry Top Coat by Sally Hansen

As well as these products:
3mm Striping tape


To create this design I started with Big Primer Base Coat. 
Once dry, I applied three coats of Golden Luster, allowing more than enough time for each layer to dry completely. This shade is very sheer, as you can see (I probably should have added an additional coat in order to hide my smile line more thoroughly, however I didn't notice until I reviewed the photos). 
I then applied a coat of Kwik Dry Top Coat and let dry. 
Once it was completely dry, I cut four pieces of striping tape and applied two in the shape of a triangle on my middle and ring fingers, making sure to adhere it well to the nail. I then applied Lady In Black to the inner triangle on my middle finger, making sure it was opaque, then removed the tape. Moving onto my ring finger, I painted Lady In Black on the outer section of the nail, again ensuring complete coverage and removing the tape. Once dry, I applied another coat of Kwik Dry Top Coat to finish the design. 
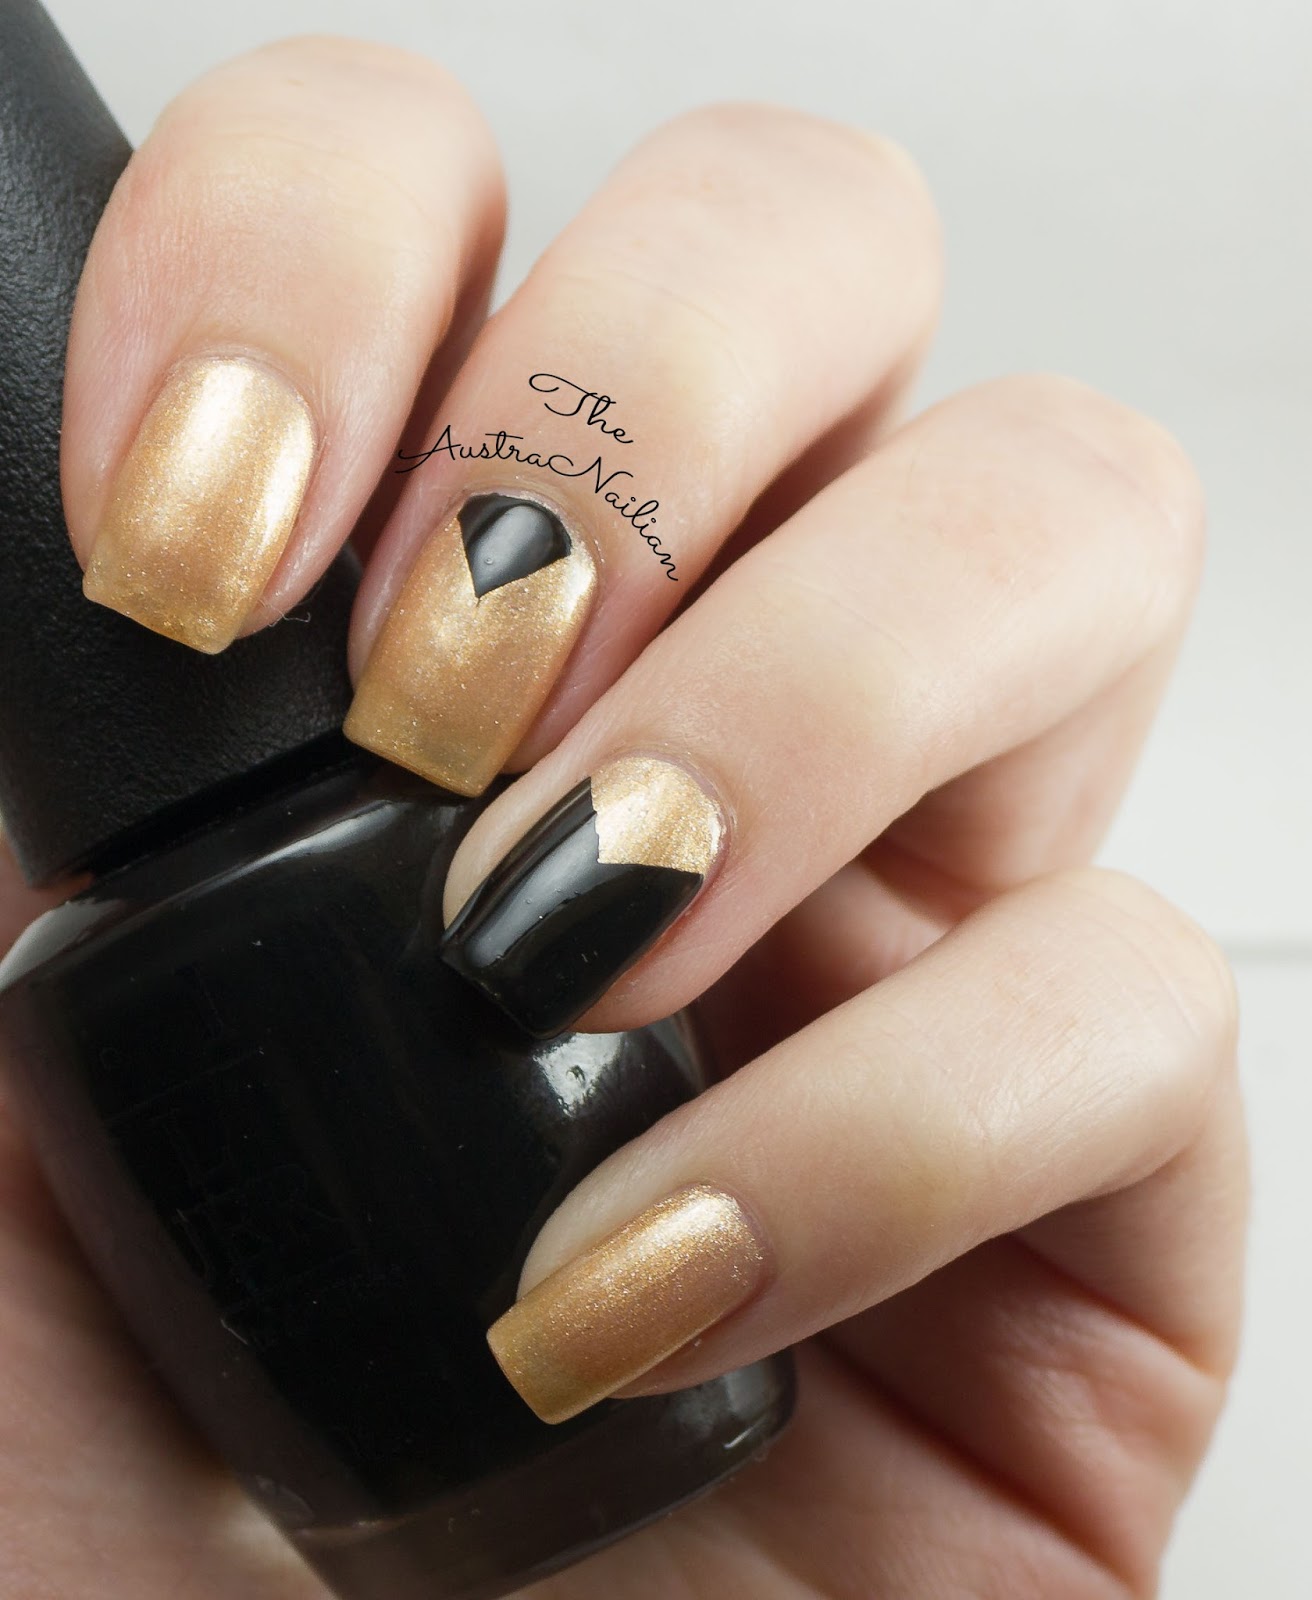

Simple, yet beautiful.
A perfect example of how black and gold were just made for each other.
I really do love this gold polish, however I just wish it were more opaque...*sigh*... we can't have it all now, can we?

The beauty of this design really is in its simplicity.
It's so easy that ANYONE can do it - all you need are your favourite colours and some striping tape - which is cheap!
So cheap, in fact, that I have bucket-loads of it... I really should incorporate it more into my designs!  


So, let me know your thoughts.
Do you like the black and gold look?

What colours would you try for this design?

Thanks for stopping by!

Sunday, 15 April 2018

Holographic Aztec Inspired Nail Art

Hello everyone!

I hope you're enjoying the weekend. It has been raining on and off for the last few days here, which is amazing and much needed! I love rainy days; staying inside with cozy clothes and all the internet I can poke a stick at. I spent most of yesterday looking at various nail art to get some new ideas. It didn't turn out as successful as I had hoped, but it's always good to see what everyone else is doing with their amazing nail skills.

Today, I am bringing you this fun, holo-filled, Aztec-inspired nail art. I have these fabulous holographic polishes from Celestial Cosmetics that are dying to see the light of day again! I am always so scared to use holo in nail art, but I think this one has helped break me out of this a bit. Hopefully you'll get to see more of it. 

Holographic Aztec-inspired Nail Art

For this design I used these polishes:
Blanc by Essie
Classy, Sassy & A Little Badassy by Celestial Cosmetics
Hell In High Heels by Celestial Cosmetics
Broken Glass by Celestial Cosmetics
Crystal Ship by Celestial Cosmetics
Black Stamping Polish by Emily de Molly
Big Primer Base Coat by Sally Hansen
Kwik Dry Top Coat by Sally Hansen

I also used these items:
BP-L048 Stamping Plate by Born Pretty
Large clear stamper
Scarper
Liquid Latex by Lulaa

Holographic Aztec-inspired Nail Art with Hell In High Heels

I started this design with Big Primer base coat. After drying, I applied two coats of Blanc. I then applied liquid latex around each nail. Taking Broken Glass, I wiped the excess polish off the brush using the neck of the bottle, then gently brushed it on to each nail. I continued with Crystal, Hell In High Heels, and Classy, Sassy & A Little Badassy. I did go back in with the polishes that I felt needed a stronger presence. I then took BP-L048 stamping plate, painted Black stamping polish over the design I wanted, scraped off the excess and used my stamper to transfer each design to the nail. I used three different designs, all from the same plate. After allowing the polish ample time to dry, I applied Kwik Dry Top Coat to finish. 

Holographic Aztec-inspired Nail Art with Broken Glass

So that's all for this one!
I love dry brush nail art - with the addition of holo and stamping over top, it's such a fun design! I love the colour combination of this design, the variation of strong bright colours with the soft ones create a nice juxtaposition. 


I decided to use different designs from the same plate. I don't do this too often, and I'm seeing why - I'm not all that pleased with how it turned out.
If I were to do it again, I'd use the diamond on my pinky, and possibly only on two nails, to really let that dry brush holo shine. Either way, it's still a cool design (in my totally biased opinion).


What are your thoughts?

Thanks for stopping by!